
How To Make A Programming Cable For The Anytone 778uv
The Anytone AT-778UV mobile rig has been popular with members of the club, there are three of us with this. The price and functionality is right. Martin Lynch sell this with the programming cable, and indeed I chased them up to get mine, but I have lost it since getting it. I have a FTDI USB to serial cable, originally for an Arduino, but I program my other rigs with that and CHIRP. I wasn’t keen on installing the Anytone cable anyway, as it uses the infernal Prolific driver1. If I can avoid anything to do with Prolific or its clones I do.
There isn’t any detail on the cable, either because the Anytone 778UV is still a little bit new, or perhaps because CHIRP doesn’t support it. However, it is easy enough. The main clue is on page 10 of the manual
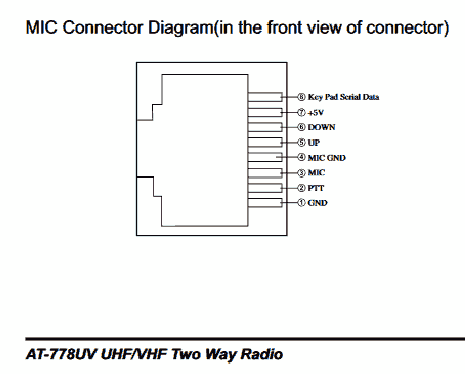
Presumably the data connection to the mic is how you get to set the frequency using the keypad, and perhaps how the lights get lit on the multifunction mic, with a microcontroller on the mic talking to the one in the rig. To make my programming cable I guessed this data port was still used, so I Googled a bit and came to IZ3ZVO’s website and followed his instructions for making the cable for the Anytone AT-5888UV. I’m guessing if you have a cable for that rig it will work with the Anytone AT-778UV. But I haven’t tried it, do that at your own risk.
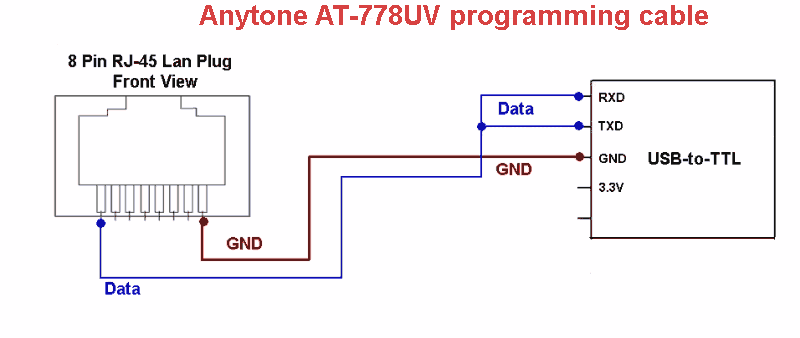
A FTDI cable with header is a standard device used with Arduinos. I always get mine from usbttl on ebay which are dearer at £12, but not as dear as a £20 programming cable for the AT778 although you can get that a little bit lower from China. I am prepared to pay a bit more because life is too short to try and save money wrangling cheap Chinese Prolific clones IMO, and I only need one cable, not one per rig. I get the clear USB cable with Tx/Rx LEDs because it is dead useful to see if you have data passing. You can get two variants of this cable, a 3.3V or a 5V cable. It doesn’t matter, since you won’t be using the power connection. These FTDI cables for Arduino are 3.3V TTL levels, do NOT use 5V TTL logic levels if you are building your own serial gizmo instead of using a FTDI cable.
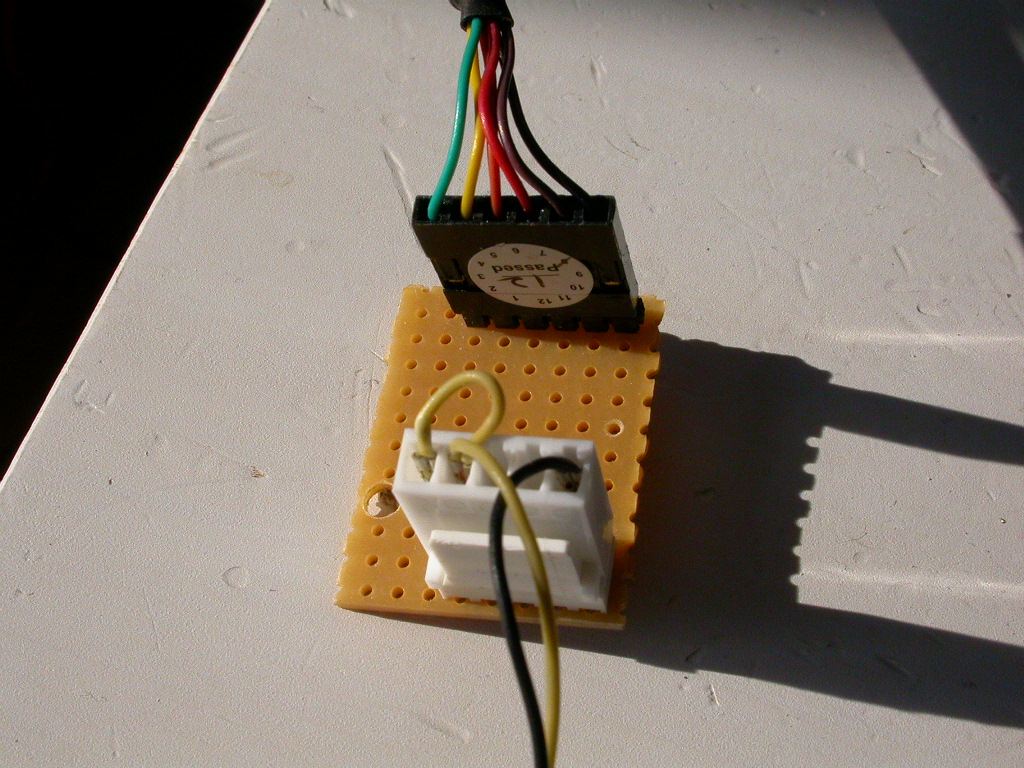
I made a breakout board using a piece of stripboard and SIL pins on one side and a Molex 5 way header on the other for my other rigs. That way I can still use the cable for Arduino programming, because it is the same chip I always know it’s on COM7, whether that is for CHIRP, the Arduino IDE or for the Anytone software.
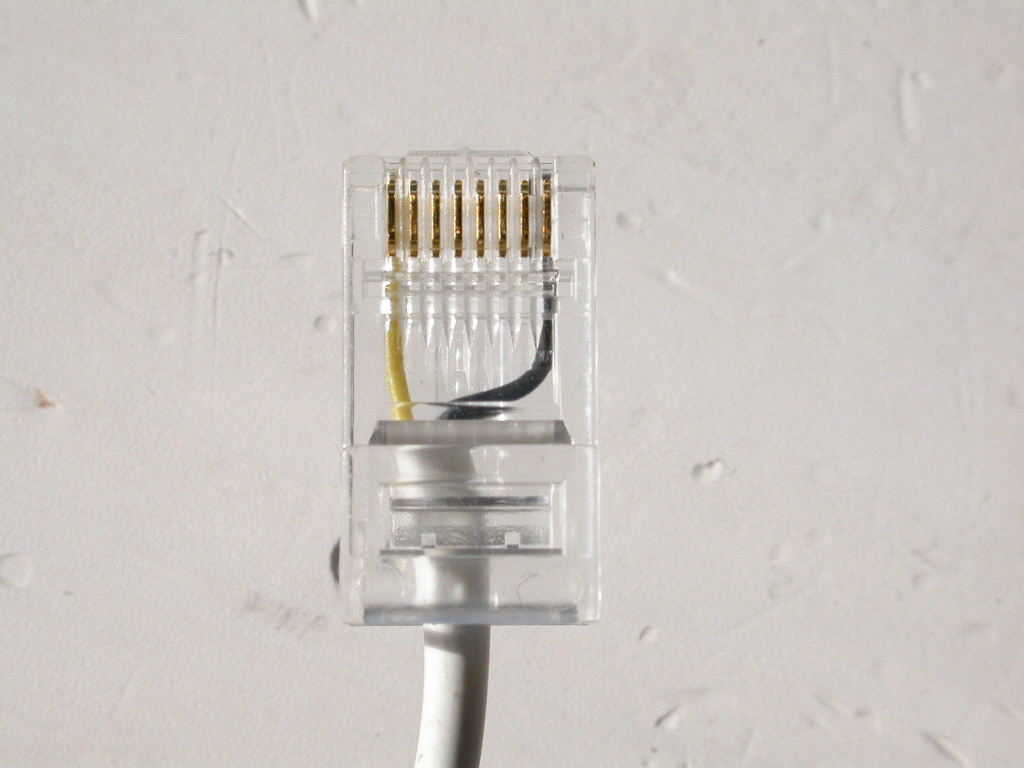
IZ3ZVO used a pre-made LAN cable cut in half for his serial cable, I found it easy enough to crimp just two wires to a RJ45 connector, which way you go depends on if you have access to a RJ45 crimp tool or not. The data rate is much slower than Ethernet so it doesn’t matter which way you go. Use the Anytone manual for how to wire the RJ45 connections.
Since most rigs have a separate Tx and Rx pin I simply jumper these together for my Anytone cable. Anytone have probably discovered how to set Tx to high-impedance when receiving. However they do it, that cable works fine both receiving data from the rig and changing and updating it.
Richard G7LEE
-
Somewhere way back when somebody in China cloned the Prolific serial chip. I can see why Prolific got hacked off with that, and as a result updated their driver for windows 10 and shut down all the previous copies, but it’s still pretty nasty. Google fake prolific chip for the gory details. ↩